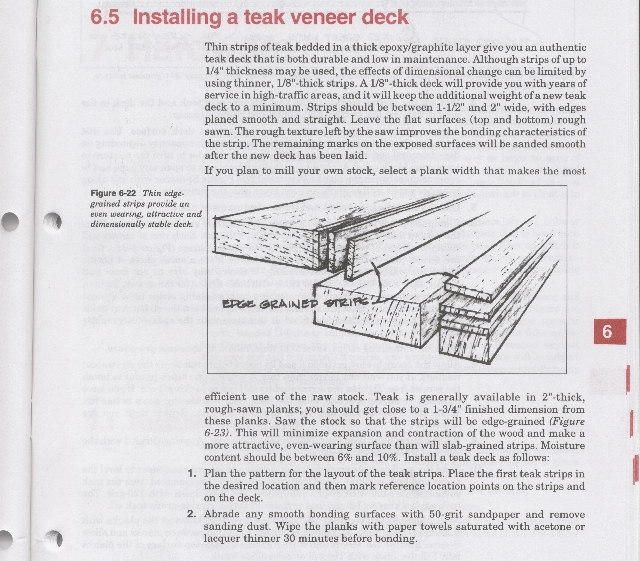
Alwest 370 Teak Decks
Article by Rob Farrow (rob.farrow@sympatico.ca) based on the 2004/2005 addition of teak decks to the 1972 Alwest 370, “Catherine Ann”.
Teak Decks on a House Cruiser ???? Who would do that ????
|
|
We have owned “Catherine Ann” for over 13 years and she has progressed well into the “over improved” category, but . . . . she continues to be my main hobby . . .
If you are tired of replacing outdoor carpeting every few years, this is one alternative to consider . . .
|

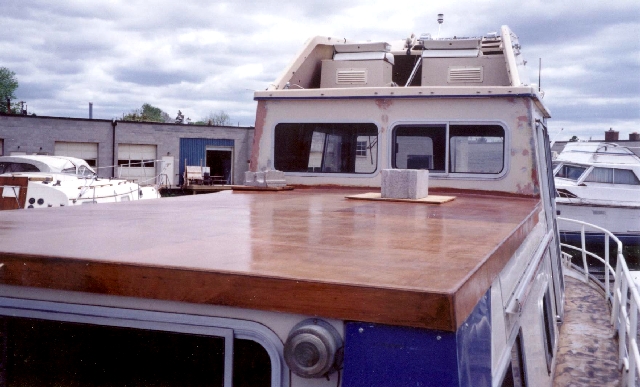
14 years ago, we rescued this boat from a yard in Keswick and began a restoration journey that continues today. The cabin roof (amongst many other things) was in rough shape and one of the first orders of business was to keep the rainwater on the outside. (picture taken in 1994)
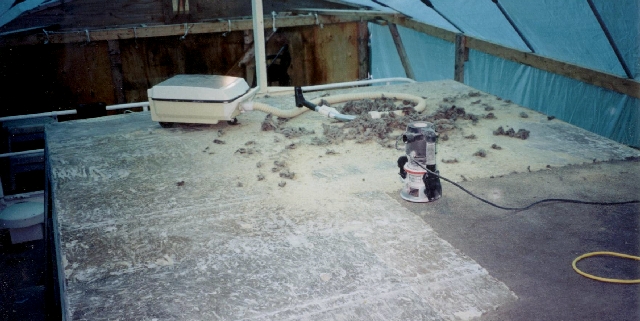
10 years later, I was removing the 2nd round of “promised to last for ever” outdoor carpet with a router, because it was too deteriorated to pull off and the glue would gum up any kind of sanding device . . . . .
About that time, I happened to find the following article from West System Epoxy (www.westepoxy.com) and through discussion with their technical advisors, decided that not only would this work on a plywood substructure, but it could also work on an aluminum substrate.
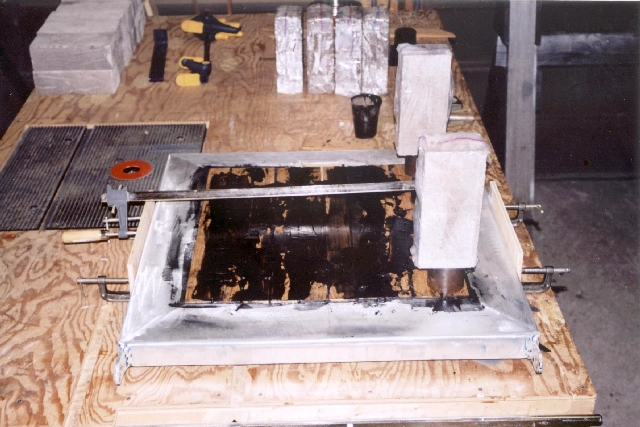
I was not about to insert any screw holes into either my cabin roof structure or my aluminum decks, (as suggested in the West article) so another plan was needed. My entire installation was done with bar clamps to control the crosswise bow of the wood strips, 3/16″ plastic spacers (used with ceramic tile) to control spacing and many bricks (which I just happened to have) wrapped in plastic so they would not stick to the epoxy, to hold the strips in position until the epoxy cured.
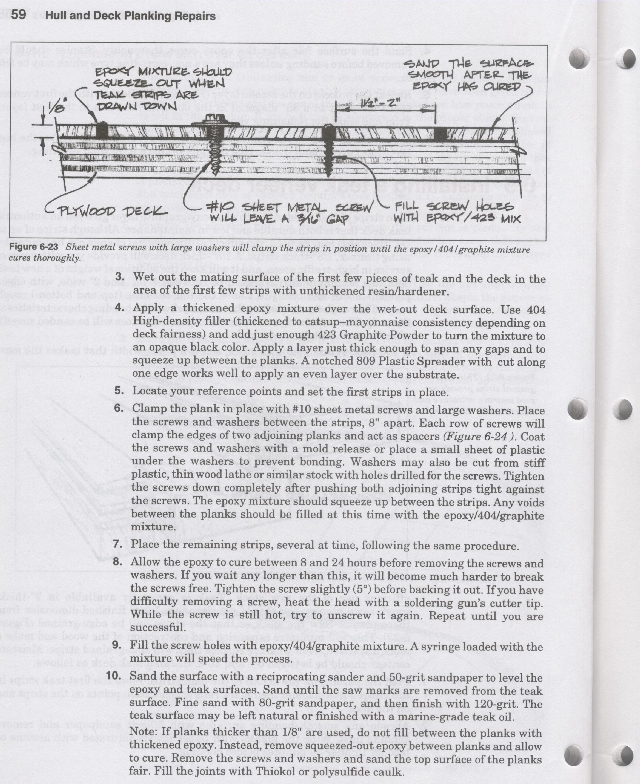
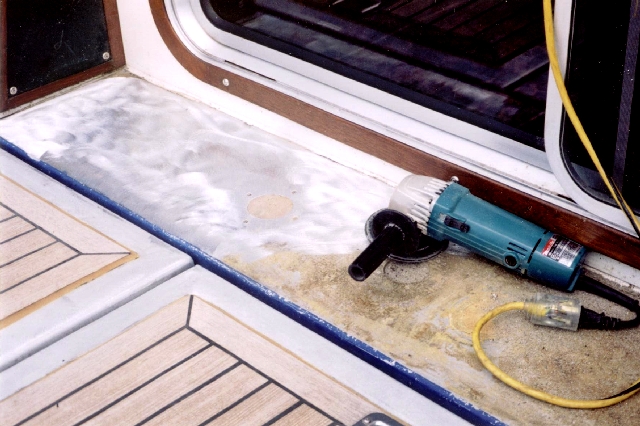
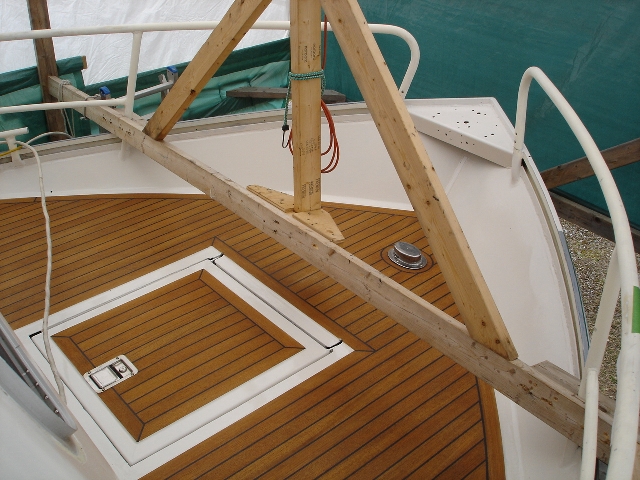
West recommended etching the aluminum to improve the epoxy bond. I was concerned about being able to remove all of the acid from the seams and weld beads and thus opted not to do this. It is very important to coarse grind the surface of the aluminum just before the epoxy is applied. I have found that the epoxy bonds very well to freshly cleaned aluminum which is above 15o C. Below this temperature or forgetting to grind off the aluminum oxide will cause bonding problems. The following pictures show the installation sequence across the deck area aft of the cabin structure.
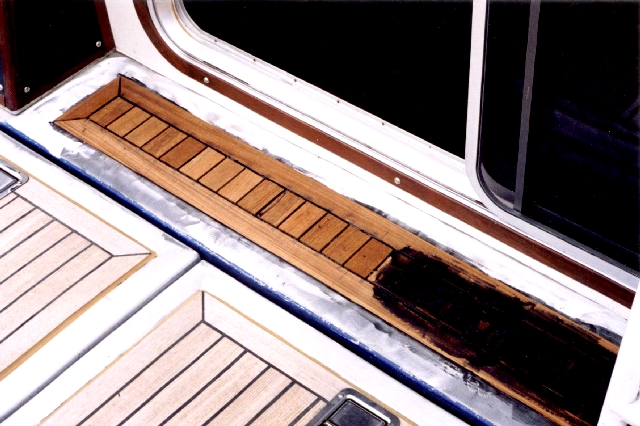
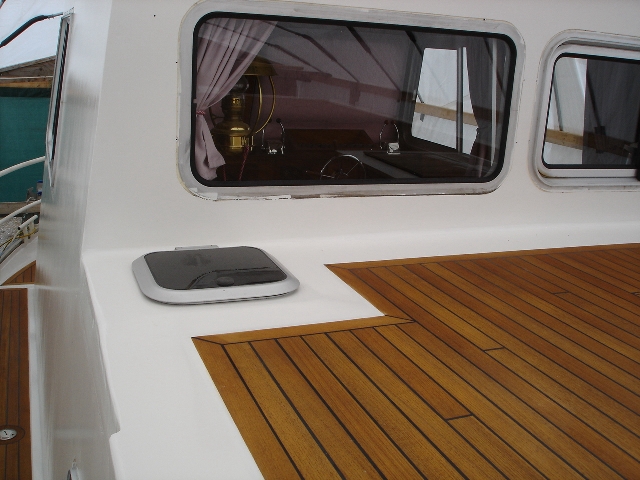
In some areas additional preparation was required. Anywhere that water would stand previously (ie the last areas of the old carpet to dry) needed to be faired so that they would drain properly. There were a couple of low spots (about 1/4″ maximum depth) on the front deck.
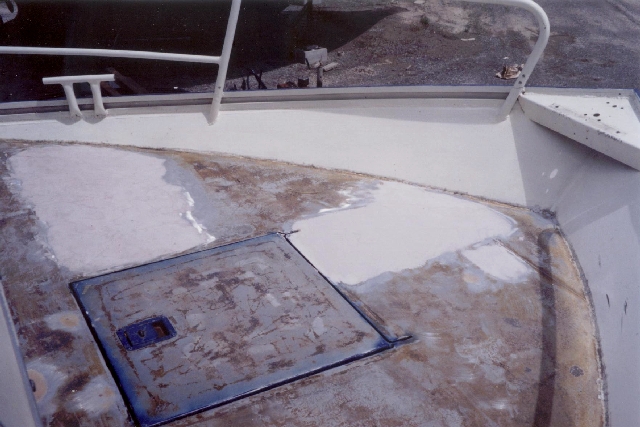
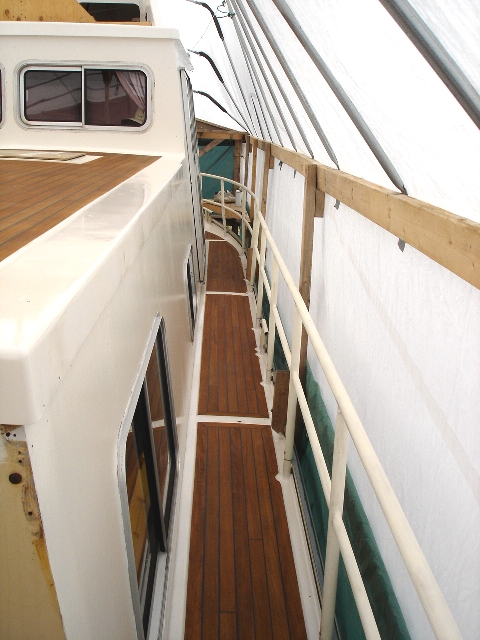
The side decks need special treatment as well. One of the drawbacks to the Alwest design is that the extrusions used for the gunwales do not allow any drain openings, thus there was often water standing on the side decks if the boat was low in the bow for any reason. I installed two deck drains on each side deck and used epoxy filler to create slightly domed sections for the teak. Thus the centre of each teak area is about 1/4″ higher than the outside edges, causing it to drain and dry quickly.
This was a “fun” project, and the results are durable and look good . . . . but it took two seasons to complete what I thought would be a 2 month project.
Teak is many times more expensive than any other wood and it is brutal on cutting tools. I spent several hundred dollars on band saw blades, planer blades and sanding belts for this project.
I have tried several different teak oils, but oils tend to blacken the teak in our climate. The best solution so far seems to be a light power washing a couple of times a year. I have been told that occasionally washing the decks with salt water will keep them “teak gray” as opposed to going black. I have yet to try this.
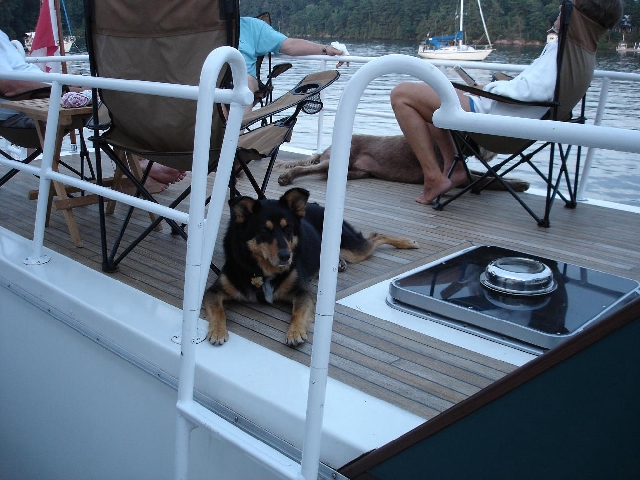
But . . . . . when you add summer and friends (and dogs) it is a nice place to be . . .